Introduction
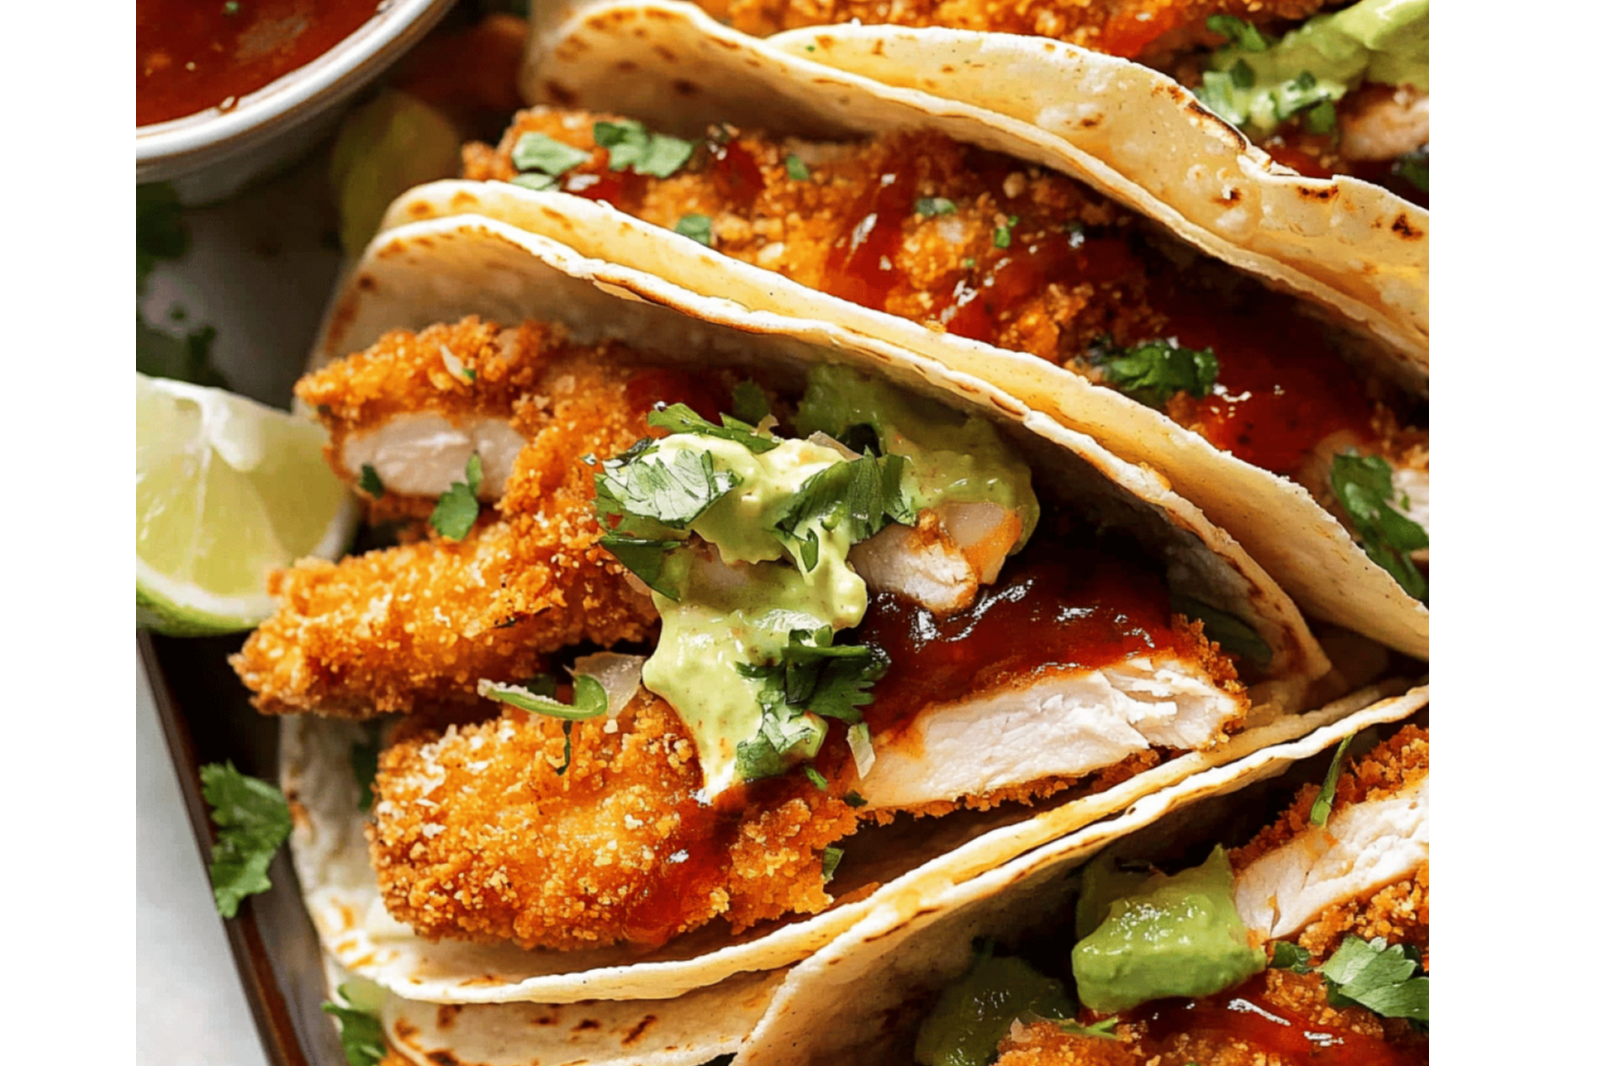
If you’re looking for a fun and delicious way to enjoy chicken, look no further than these crunchy chicken taco fingers. They are not only perfect for a weeknight dinner but are also an excellent option for parties and gatherings. With a crispy coating and a satisfying crunch, these baked chicken fingers are sure to delight both kids and adults alike. Let’s dive into the details to find out how to make this scrumptious dish.
Detailed Ingredients with measures
Chicken breast – 500g, cut into strips
Taco seasoning – 2 tablespoons
Flour – 1 cup
Egg – 1 large, beaten
Panko breadcrumbs – 1 cup
Cooking oil spray – for baking
Prep Time
10 minutes
Cook Time, Total Time, Yield
Cook Time – 20 minutes
Total Time – 30 minutes
Yield – Serves 4
These crunchy chicken taco fingers are simple to prepare and offer a delightful twist on traditional chicken strips. Enjoy them with your favorite dipping sauce, and watch as they disappear from the platter in no time!
Detailed Directions and Instructions
Prepare Chicken Mixture
Start by shredding pre-cooked chicken. You can use rotisserie chicken for convenience. In a large bowl, combine the shredded chicken with taco seasoning, cream cheese, and green onions. Mix well until all ingredients are thoroughly combined.
Prepare the Coating
In a separate bowl, combine breadcrumbs and grated cheese. This mixture will create a crunchy coating for the taco fingers.
Assemble Taco Fingers
Take a sheet of filo pastry and cut it into rectangles. Place about a tablespoon of the chicken mixture in the center of each rectangle. Fold the sides over the filling, then roll it up tightly to form finger shapes.
Coat the Taco Fingers
Dip each rolled taco finger into the breadcrumb and cheese mixture, ensuring they are fully coated. This will give them a crunchy texture when baked.
Prepare for Baking
Preheat the oven to 200°C (about 400°F). Line a baking tray with parchment paper. Arrange the coated taco fingers on the tray, ensuring that they are spaced apart for even cooking.
Bake the Taco Fingers
Place the baking tray in the oven and bake for approximately 20-25 minutes or until the taco fingers are golden brown and crispy.
Serve Immediately
Once done, remove the taco fingers from the oven and let them cool slightly. Serve them warm with your choice of dipping sauce or toppings such as salsa, guacamole, or sour cream.
Notes
Chicken Options
You can use leftover chicken or any cooked chicken. Ensure the chicken is shredded into small pieces for the best texture.
Customizing Seasoning
Feel free to adjust the taco seasoning to your preference. You can add more spice or use a mild version based on your taste.
Filo Pastry Handling
Filo pastry can dry out quickly, so keep it covered with a damp cloth while assembling the taco fingers to prevent it from becoming brittle.
Storage Instructions
If you have leftovers, store them in an airtight container in the refrigerator for up to 3 days. Reheat in the oven to maintain crispiness.
Cook techniques
Oven Baking
Baking the chicken taco fingers in the oven allows for a healthier cooking method compared to frying. It results in a crispy exterior while keeping the chicken tender inside.
Coating Technique
Using a combination of flour, eggs, and panko breadcrumbs helps achieve a crunchy texture. Ensure that the chicken is well-coated for maximum crunch.
Seasoning
Proper seasoning is essential to enhance the flavor of the chicken. Use a blend of spices and herbs to create a savory profile that complements the taco theme.
Meat Preparation
Cutting the chicken into strips ensures even cooking and makes it easier to eat. This technique is ideal for finger foods.
Resting Time
Allowing the chicken to rest after baking helps to set the coating and maintain its crunchiness when served.
FAQ
Can I use chicken thighs instead of chicken breasts?
Yes, chicken thighs can be used for a juicier result. Just adjust the cooking time as needed.
How do I store leftovers?
Store leftover chicken taco fingers in an airtight container in the refrigerator for up to 3 days.
Can I freeze these chicken fingers?
Yes, you can freeze them before baking. Just ensure they are well-wrapped to prevent freezer burn.
What can I serve with chicken taco fingers?
These can be served with dips like salsa, guacamole, or sour cream for added flavor.
Can I make this recipe gluten-free?
Yes, you can use gluten-free breadcrumbs and flour to adapt this recipe for a gluten-free diet.
Conclusion
The Crunchy Chicken Taco Fingers are a delightful and versatile dish that brings together the flavors of tacos in a fun and easily shareable format. Perfect for gatherings or a tasty weeknight meal, these baked treats offer a healthier alternative to fried options without sacrificing flavor or crunch. Enjoy them with your favorite dipping sauces for an added layer of deliciousness.
More recipes suggestions and combination
Spicy Avocado Dip
A creamy and spicy avocado dip pairs perfectly with the crunchy chicken taco fingers, adding a smooth texture and fresh flavor.
Mexican Street Corn Salad
This vibrant and zesty salad makes a great side dish, complementing the chicken taco fingers with its sweet corn and tangy lime dressing.
Guacamole and Tortilla Chips
Classic guacamole served with crispy tortilla chips is always a crowd-pleaser and enhances the taco flavor theme.
Loaded Nachos
Top a bed of tortilla chips with cheese, jalapeños, and other toppings for a sharing platter that matches the fun of the taco fingers.
Fresh Mango Salsa
A sweet and tangy mango salsa adds a refreshing complement to the crunchy chicken taco fingers, balancing the savory flavors beautifully.
Mini Taco Salads
Serve individual mini taco salads with lettuce, tomatoes, cheese, and your choice of protein for a fun and interactive dining experience.